ZS20ASL1&2 User Notes. Digitrains ASL paired projects for 2021 Bachmann Class 20 models.
Paired Locos: Do Not use ‘Consisting’.
You’ll find it useful to spend a few moments to read these notes. They have been produced so that you may obtain the maximum satisfaction from your new sound decoders which have been optimised for your paired Bachmann Class 20 models.
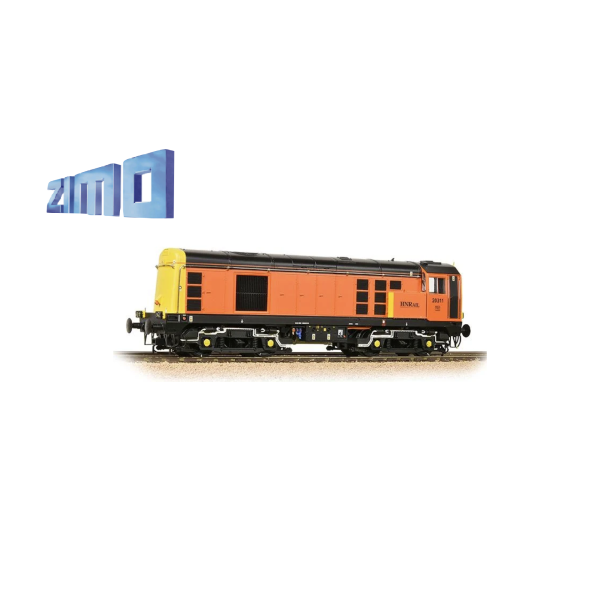
Real Class 20 locomotives were often operated in pairs. This could be two locos coupled together nose to nose (double heading), or at each end of a train in a top and tail or push-pull configuration.
This requires one loco to run ‘backwards’, cab end leading. The selected model’s motor must be reversed and special arrangements for lighting and any direction dependent sounds to be arranged.
In order to simplify changing between solo and paired operations, special facilities are included in these paired decoders, Units 1 and 2. For details please see the relevant paragraphs preceding the Functions List.
Section 1. Preparations
Paired running
The decoders as delivered are set up to operate correctly with two Class 20 locos coupled together at the nose end.
The cab light in the leading unit will illuminate as soon as it receives power. This is to signal that the locos are in a paired state.
By default, in paired mode, the address to use will be 3.
The default state is also suited to running in push-pull configuration, once the locos are coupled, nose end, to the train’s other vehicles.
Double heading is equally possible with the default state. If the running lights are illuminated (F key 0), the tail lights at the coupled end should be extinguished to comply with regulations. This can be achieved by engaging F key 10.
Solo running
Each loco is capable of operating individually. You will need to change the value in CV29 from the default value 6 to value 38. If you do this using Programming On the Main (POM), the engine sounds will continue to play seamlessly.
This will change the operating address of one loco to 2001 and the other loco to 2002.
You will also need to engage F key 26 so that lights, sounds and direction of travel operate appropriately for solo running.
Reverting to paired running requires F key 26 to be disengaged and CV29 value 6 entered for each loco.
Note
The default addresses can be changed to if you wish but the following criteria are critical for correct operation.
The paired running addresses must be both ‘short’ and identical to each other.
Solo addresses must be ‘long’ or ‘extended’ and be different from each other.
Section 2. Operations
Engine Start Up.
The fuel lines are pressurised with a priming pump prior to starting. F16 has the sound of this pump which can be played before switching on the main engine sounds.
This sound has been separated from the engine start up sounds so that you can choose to use it or not.
For engine starts you need only press F key 1.
This will crank and start the engine which will then settle down into Idle.
Throttle Response Scheme.
As supplied, the decoders will behave and sound like Class 20 locos coupled to a train.
After the start-up routine the loco will stand with the diesel engine, the Prime Mover (PM), ticking over at idle.
The sounds will respond to the throttle control in the following way:
Select speed step 1. The brakes will release, the PM will increase power to get the loco moving, and will continue until at higher speed, a further ramp up will be initiated until the final high speed running sounds begin. The precise speed steps will depend upon your model, so I suggest you make a note of the actual figures for your later use.
The sounds will spool down at similar points on deceleration.
The models can be driven in this way without ever needing to use any control other than the throttle.
If you prefer something more immersive there are extra control features to further enhance the experience.
Coasting
At whatever actual speed, or which engine note range is playing, reducing the throttle by 10 speed steps (of 128) will spool down the engine sounds to ‘Coasting’
The coasting sound will continue until you accelerate; at which point the sounds will change to those relevant to the current speed.
Alternatively, to force the engine to play idling sounds, or to avoid engine ramp up when pottering about the yard, light engine use F6 at any time
Notch Down
During any driving sound ‘loop’, at any speed, it is possible to cause the engine power to spool down to the level immediately below. This is easily achieved by reducing the speed by a single step only E.g., if the loco is playing power band 3 sounds, reducing speed with your throttle by one step will cause the sound to immediately spool down to the sound of power band 2, if in power band 1, it will spool down to idle.
Acceleration of one speed step or more will immediately ramp the sound back up to the higher power. So you can now, at any road speed, vary the engine note by reducing or adding a single speed step.
Heavy Train/Light Engine Mode Selection
The default setting is for ‘heavy train’. Inertia is high so acceleration (and deceleration) is restricted.
Activated by F5, Light Engine enables multi-function changes with one key. The switched features include reduced inertia setting to allow more rapid acceleration and engine sounds which accelerate differently.
F5 can be operated at any speed to give another way in which the engine sounds at a given road speed may be modified.
Dynamic Inertia
A combination of new features is included in the automatic operation of the throttle which will affect how the model responds to your control inputs.
The operation is identical in either ‘heavy’ or ‘light’ mode.
Put in simple terms, the wider you open the power controller, the quicker the engine sounds ramp up and the acceleration rate increases correspondingly.
What does this mean in practice?
If you use your controller’s throttle gently, with modest speed step increases, then the engine will rise and fall automatically and the model will accelerate according to the momentum setting. This is by default high when in ‘heavy mode’ and low when in ‘light engine mode’.
If however, you open the throttle rapidly, the engine will ramp up to full power and acceleration will be approximately 3 times quicker. This change in acceleration rate is variable and dependent upon throttle operation.
Working Brakes
This feature finally enables you to stop your locomotive by using a prototypically progressive braking force which will actually cause your model’s speed to be retarded under your direct control, whatever momentum you have set in CV4.
F2 will give the sound of air brake applications. They can be ‘dabbed’ or held for varying length. The sound will respond accordingly.
However, if the throttle is reduced beforehand, as a real driver would do before braking, a braking force will be applied which will continue to increase the longer F2 is held. Short dabs will provide speed trimming, held down continuously will result in a controlled ‘Emergency Stop’.
When standing, the sound can be used to simulate a Brake Test, always performed prior to first movement.
Speed Lock
Speed lock allows a steady road speed to be maintained whilst the throttle control is used to control the engine power sounds playing.
Accurately simulating the sound of a heavy train slowly climbing a gradient with engine at full power is as easy as depicting it coasting down a gradient with the engine at Idle with this single feature.
This is how it works.
Engage the Speed Lock Key, (F7) to fix the road speed temporarily. The throttle now directly controls the engine sounds only. Increase speed steps to apply more power, decrease speed steps to spool the engine down to lower power bands or to Idle.
When you wish to return speed control to the throttle disengage the Speed Lock Key
Brake Application.
When the loco comes to a halt, the driver will perform several tasks, amongst which will be to set the brakes to prevent movement.
The sound of this action will be heard a few seconds after the loco stops.
This is fully automatic and prototypical.
Flange Squeal.
Enabled with the F Key 9; if it is not engaged, the Flange sounds will not play.
If the key is engaged, sounds will operate in the following automated way:
Loco is stationary or comes to a halt. The wheels are not turning and so there would be no flange squeal in reality. No flange sound will play in your model.
Loco is moving slowly. A slow speed flange squeal will play.
Loco is moving more quickly. A faster speed flange squeal will play.
Horns
There are 12 different Horn sounds which are selected automatically by the decoder depending on speed and direction.
These have been included to more closely follow typical practice – short ‘toots’ to warn of intended loco movement and long blasts when travelling at high speed.
These are still controlled by F key 3 and F key 4 but a short ‘Acknowledgement’ version of each will play when the model is stationary. A different sound will play if the model’s intended direction is changed.
When the loco is moving at speed steps between 1 and 46 different and longer sounds will be played.
When travelling at over 46 speed steps long duration sounds are played.
Spirax Valves.
Spirax valves are used in some locos to automatically drain condensed water from compressed air tanks by opening for a brief moment to eject water and air, giving the characteristic ‘spitting’ sound. Consequently, they only operate when the tanks are pressurised, and the rate of opening gradually slowing as pressure drops below the threshold.
Operated by F key 25 this how it works.
The Spirax Valve feature may be engaged at any time, but sound will not play until the engine has been running at warm idle for a time.
After the specified duration the valves will begin to operate slowly and quietly, gradually rising to a steady rate and volume. This is the normal state with the compressor maintaining air pressure.
You may leave this sound running for the rest of the operating session if you wish.
Disengaging F25 will cause the valves to slow and fade until they stop.
Optionally, if you re-engage F25 within a few seconds, the sound will settle into a new, slower and quieter, state of repetition. This would be useful to simulate a loco shortly after shut down, when the valves may continue operating for a long time.
To stop the sound, disengage F25 and it will gradually slow and fade until eventually it stops.
The sound can be started again if the engine sounds are running in Idle.
Speed Related Detonators
F key 15 enables the warning Detonators to sound. The first explosion is heard immediately, but the time for the subsequent two alerts in the series will depend upon the road speed of the loco.
Since the detonators would be placed at 20m intervals, the faster the road speed, the quicker the sound will repeat.
These timed intervals will be calculated by the decoder.
So, when you hear the first ‘bang’, reduce the throttle to zero and hit the Brake Key (F2) for an emergency stop. If you manage to stop the loco in time, you may prevent subsequent detonations.
F 15 must be disengaged and road speed reduced to zero before you will be able to operate this feature again.
Shunt Mode
Engage F24 to reduce maximum speed by 50% and remove all inertia and momentum.
This will give finer control of speed and rapid reaction to throttle changes to enable more precise shunting moves.
The sounds will be automatically adjusted to suit.
Live Volume Control
Provided the sound is switched on and the ‘fade’ button is not active, it is possible to change the overall volume to suit changing needs.
Engage F27 and the sound levels will gradually reduce, eventually to silence
Engage F28 and the sound levels will gradually increase, eventually to the maximum set within the sound project.
In each case, disengage the F key when the desired level is attained. Set F27 and F28 as ‘momentary’ if your DCC controller allows you to do so.
Note: If the volume controls appear to not function, check that F19, F27 and F28 are disengaged before making a further attempt.
Some Useful Hints
The value at CV255 will identify which Unit number applies, though for normal operations it’s not usually important to know which is which.
Paired running.
To operate as a pair, do not use ‘consisting’. Simply change the value in CV29 to 6 for each decoder, and ensure F key 26 is disengaged.
The cab light of the ‘leading’ loco will be illuminated. This will automatically extinguish as soon as the model’s move. (and it will illuminate again when standing).
If you do not wish the cab light to be illuminated for long periods when standing, you can temporarily engage F 26. Remember to disengage F26 before attempting to move off!
The cab light in the ‘trailing’ loco may be switched on or off at any time with F key 8.
If the direction is changed the action of lights in leading and trailing cabs will automatically be reversed.
This allows the light in the trailing cab to be illuminated whilst travelling, but the leading cab will not be illuminated during travel.
(Note. The automatic extinguishing of cab lights is not enabled in solo mode, though F key 8 operates them in each mode).
When coupled together with no other vehicles coupled, or when locos are at each end of a train, the trailing loco will need to display tail lights.
This is the default status in these sound projects. Tail lights of the leading loco plus all exterior lighting on the trailing loco will be disabled automatically.
On the other hand, when two locos are coupled together at the head of a train, the only external lights should be those at the front of the leading loco, no intermediary lighting is allowed.
In these circumstances, F key 10 will disable the tail lamps on the trailing loco, direction dependent. (However, when operating solo, F26 engaged, tail lamps can be enabled with either F key 20 or 21 depending upon direction. This is due to Bachmann’s unusual lighting circuit design).
Changing from daylight running lights to night time running lights (if fitted) remains possible at all times with F key 14.
Sounds
Some sounds will play in both models, but others will be heard at the leading loco only, again direction dependent.
Each loco has different horn sounds for each direction and this facility is carried over to paired operations.
The horn durations remain speed related when in paired configuration too.
The speed related Detonator sounds become direction dependent when in paired mode so that the sounds only play at the leading loco.
Buffering up is enabled with F key 11, which can be engaged at any speed, but will only play when standing.
Try this. Whilst moving but just before buffering up to stock, engage F key11. Control the approach with throttle or brakes (F key 2) as required so that the loco stops as it hits the buffers. The buffering up sound will be heard. With a little practice, you will be able to co-ordinate the visible and audible events.
Disengage F key 11 before reversing direction.
The coupling sounds, F key 12, will play from the loco at the coupled end and only when standing.
The Despatch Whistle, F key 17 (rarely used on freight operations) will sound from the trailing loco, and only if standing.
Driver’s door slam sound on F key 18 will play at the leading loco when standing. Each loco has a different slam sound.
Trouble Shooting
The correct operation of any paired decoders relies upon each remaining consistently powered in order to reliably receive and identically decode DCC control signals.
If these become out of sync with each other, e.g. power outage, one model removed from the tracks, anomalies may arise.
Check the status of F keys 20 and 21.
When running as a pair F20 and F21 must not be active.
Check the status of F key 26.
When running paired, F26 must not be active.
When running solo, F26 must be engaged.
Due to the way some controllers operate DCC packets for higher F keys, the display may show a different status from reality.
Toggling F 26 will usually correct this.
Failing this, reset CV8 = 8 to restore the defaults.
|
|
|
|
|
|
|
|
|
|
|
|
F Key
|
Function/Sound
|
|
|
|
|
|
|
|
|
|
0
|
Light Switch Sound plus Lights
|
|
|
|
|
|
|
|
|
|
1
|
Sound On/Off
|
|
|
|
|
|
|
|
|
|
2
|
Brake Key
|
|
|
|
|
|
|
|
|
|
3
|
Speed Related Single Horn
|
|
|
|
|
|
|
|
|
|
4
|
Speed Related Two Tone Horn
|
|
|
|
|
|
|
|
|
|
5
|
Heavy train / Light Engine
|
|
|
|
|
|
|
|
|
|
6
|
Engine Idle/Coasting
|
|
|
|
|
|
|
|
|
|
7
|
Speed Lock Key
|
|
|
|
|
|
|
|
|
|
8
|
Cab light
|
|
|
|
|
|
|
|
|
|
9
|
Enable Speed Related Flange Squeal
|
|
|
|
|
|
|
|
|
|
10
|
Disable Tail Lamps (when paired)
|
|
|
|
|
|
|
|
|
|
11
|
Buffer up
|
|
|
|
|
|
|
|
|
|
12
|
Coupling
|
|
|
|
|
|
|
|
|
|
13
|
High intensity light (where fitted)
|
|
|
|
|
|
|
|
|
|
14
|
Day/night mode selection (where fitted)
|
|
|
|
|
|
|
|
|
|
15
|
Enable Speed and Direction Related Detonators
|
|
|
|
|
|
|
|
|
|
16
|
Priming Pump
|
|
|
|
|
|
|
|
|
|
17
|
Despatch Whistle
|
|
|
|
|
|
|
|
|
|
18
|
Drivers Door Closed
|
|
|
|
|
|
|
|
|
|
19
|
Fade All Sounds
|
|
|
|
|
|
|
|
|
|
20
|
Directional lighting OFF nose end (when solo)
|
|
|
|
|
|
|
|
|
|
21
|
Directional lighting OFF cab end (when solo)
|
|
|
|
|
|
|
|
|
|
22
|
Compressor
|
|
|
|
|
|
|
|
|
|
23
|
Windscreen Wipers
|
|
|
|
|
|
|
|
|
|
24
|
Shunt Mode (Half Speed, No Inertia)
|
|
|
|
|
|
|
|
|
|
25
|
Spirax Valves (See Text)
|
|
|
|
|
|
|
|
|
|
26 ON
|
Please Engage when Operating as Solo Loco
|
|
|
|
|
|
|
|
|
|
26 OFF
|
Please Engage when Operating as Paired Locos
|
|
|
|
|
|
|
|
|
|
27
|
Volume Down
|
|
|
|
|
|
|
|
|
|
28
|
Volume Up
|
|
|
|
|
|
|
|
|
|
|
|
|
|
|
|
|
|
|
|
 MENU
MENU