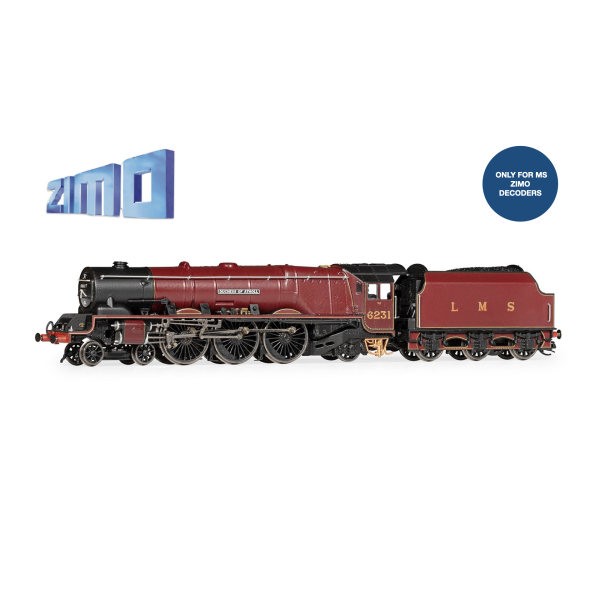
Digitrains MS039P LMS Coronation/ Duchess Sound Project For ZIMO MS Decoders Only. V23.06
This project has been created to be used with FW MS4.219 or later.
Please read these notes to ensure you obtain the maximum satisfaction from your new sound project. The sounds should work perfectly as supplied, but you can fine tune them further through the programming function on your DCC controller.
Operating Your ZIMO Sound Decoder.
As supplied, the decoder will operate in ‘Full Gear’ i.e. steam admitted for the whole of the piston stroke, but you can switch between the available sounds using your DCC controller by following the straightforward instructions below.
This project uses ZIMO’s ability to switch between ‘full gear’ sounds, typical of starting a heavy train, or light engine sounds as the driver reduces the duration of steam input to the cylinders.
These are all fully configured within the project, waiting for you to operate the ‘Light Engine’ (F5).You can revert back at any time.
.
There are many Functions, most of which have an individual sound attached. Some will perform a physical function (e.g. turning on the lamps, if fitted), and some will do both depending on equipment installed). Please study the list below.
In any of the driving sound sets, increasing the speed step by 1 or more will produce an acceleration sound for a few seconds. If you wish continuous acceleration, ease the throttle setting upwards rather than 0-128 in one jump!
Similarly, in each sound set, a reduction of 1 speed step or more will stop the exhaust beats and the loco will ‘coast’ (or drift) for a few seconds before resuming exhaust beats. Continuous drifting can be simulated by easing the throttle settings down, one step at a time.
Many sounds may be modified (including changing or removing them) individually, and the volume levels may also be varied to suit your own needs. For this, and much more information on your decoder’s outstanding abilities, please download the latest Small Decoder Manual from: www.zimo.at/web2010/
Special Zimo Function on F5, Light engine
The Inertia and Momentum settings by default are set high, producing acceleration and deceleration rates expected from a heavy train. A light engine can accelerate more rapidly, so when engaged F5 will instantly reduce inertia and momentum to provide more brisk acceleration and deceleration.
Heavy. This is the one to use to start with a heavy train on the hook. Steam is admitted to the cylinders for the full piston stroke. The chuffs are loud and harsh as steam at virtually boiler pressure is exhausted. This configuration gives the maximum power, but is the least efficient setting.
Light. With a light engine movement, the driver will reduce the duration for which steam is admitted to the cylinders. The steam still provides power for the rest of the stroke by expansion. This reduces the pressure of the exhausted steam, resulting in softer more subdued Chuffing.
Tip. You can also use F5 to reduce the stopping distance without using, or use in conjunction with the Brake Key
Working Loco Brakes
In a real locomotive, acceleration, speed and deceleration are under control of the driver. He will use his experience of the locomotive type, the train weight and knowledge of the route (or ‘Road’) to anticipate the control movements required to achieve the required performance and safety.
Deceleration is often achieved by reducing power only, allowing the locomotive to ‘drift’ to lower speeds. Typically, the brakes are only used to fine tune this rate of deceleration or make a halt at a specific point. At other times, strong braking will be required even at high speed.
The objective is to simulate the real driving experience as closely as possible, so here’s how it works.
With the locomotive moving, reduce the throttle setting to zero. The loco will drift, gradually decelerating and the exhaust sound will fade into rod clanking.
Engage Brakes with F key 2.
A short ‘dab’ will produce a short brake application sound and a modest increase in deceleration rate. You can think of this as ‘Speed Trimming’. This can be repeated if required, and is entirely prototypical in operation.
A longer application will produce a longer brake application sound and a higher rate of deceleration.
The longer the Brake Key is held ‘on’, the greater the brake force applied.
Holding the Brake Key down continuously will produce a long brake application sound and the loco will perform a prototypically modelled emergency stop, i.e. Brake force increases with time; maximum brake force and deceleration rate is achieved immediately prior to coming to a halt.
Automatic brake squeal will accompany the final moments before halting.
The Brake Key can also be used to simulate brake testing.
The Brake Key may also be operated during deceleration between different speeds, e.g. speed restricted areas.
In this case, reduce the throttle to a suitable lower setting. The engine sound will change according to the features described earlier and the model will gradually decelerate. To increase the rate of deceleration, use the Brake Key as before, and the speed of the loco will be ‘trimmed’ to the newly selected speed step.
Please note that real locos do not stop dead even during an emergency stop. To reflect this, an emergency stop will be reasonably abrupt but not sudden.
If your DCC controller is equipped with a ‘panic button’ to avert imminent catastrophe, this will still operate as usual, and will have more immediate, though less prototypical, effect than the Brake Key.
Please note that the inclusion of the Brake Key allows high inertia settings in CV4. This produces a realistic drawn out drifting action; use the brake key to stop the model accurately when required, e.g. signals at danger or station stops.
Whistles
New to this version, there are 6 different whistle sounds which are selected automatically by the decoder depending on speed and direction.
These have been included to more closely follow typical practice – short ‘toots’ to warn of intended loco movement and long blasts when travelling at high speed.
These are still controlled by F key 3 and F key 4 but a short ‘Acknowledgement’ version of each will play when the model is stationary.
When the loco is moving at low speed (0 - 15 Speed Steps) slightly longer sounds will play.
When the loco is moving at medium speed (15 - 40 Speed Steps) different and longer sounds will be played.
When travelling at 40 speed steps or higher long duration sounds are played.
Each F key can be selected at any time.
Flange Squeal.
Enabled with the F Key 9. If it is not engaged, Flange Squeal will not sound.
If the key is engaged, sounds will operate in the following automated way:
Loco is stationary or comes to a halt. The wheels are not turning and so there would be no flange squeal in reality. No flange sound will play.
Loco is moving slowly. A slow speed flange squeal will play.
Loco is moving more quickly. A faster speed flange squeal will play.
Loco is moving very quickly. Flange squeal ceases until speed drops below the threshold set.
Wagons Snatching and Buffering
Enabled with F Key 17; if it not engaged, the wagon Snatching and Buffering sounds will not play under any circumstances.
If the key is engaged, and the Light Engine Mode (F key 5 is also engaged, the sounds will not play under any circumstances. (No wagons coupled in Light Engine Mode).
If the key is engaged, and the Light Engine Mode (F key 5) is not engaged, sounds will operate in the following automated way:
Loco is stationary. The sounds are not played.
Loco moves off/accelerates gently. The sounds are not played.
Loco moves off/accelerates more rapidly. The sound of the couplings taking up slack as the train stretches plays. This is also the case if the loco accelerates further when already moving.
Loco decelerates gently. The sounds are not played.
Loco decelerates more rapidly. The sound of several wagons buffering up is played each time.
Loco comes to a halt with the Brake Key (F key 2) engaged. The sound of several wagons buffering up is played after it comes to a halt.
Speed Related Detonators
F key 18 enables the warning Detonators to sound. The first explosion is heard immediately, but the time for the subsequent two alerts in the series will depend upon the road speed of the loco.
Since the detonators would be placed at fixed intervals, the faster the road speed, the quicker the sound will repeat.
The appropriate time interval will be calculated by the decoder.
So, when you hear the first ‘bang’, reduce the throttle to zero and hit the Brake Key (F2) for an emergency stop. If you manage to stop the loco in time, you may prevent subsequent detonations.
F Key 18 must be disengaged and road speed reduced to zero before you will be able to operate this feature again.
Unfitted Freight mode and Pinned Brakes
Engaging F21 will activate a guard to driver instruction, explaining that the wagons aren’t Fitted! The top speed will also be reduced as per the instruction when engaged.
F22 will play a pinned loco brake sound as you drive along, until you either disengage F21 or F22, or come to a stop.
Functioning Handbrake
When F11 is engaged, the sound of the handbrake being ‘wound on’ will be heard. When this sound stops, the model will no longer be drivable.
To release, disengage F11. The sound of the handbrake being ‘wound off’ will be heard. When this sound ends, you may drive the loco (subject to the status of F2)
Live Volume Control
Provide the sound is switched on and the ‘fade’ button is not active, it is possible to change the overall volume to suit changing needs.
Engage F27 and the sound levels will gradually reduce, eventually to silence
Engage F28 and the sound levels will gradually increase, eventually to maximum.
In each case, disengage the F key when the desired level is attained. Set F27 and F28 as ‘momentary’ if your DCC controller allows you to do so.
Note: If the volume controls appear not to function, check that F19, F27 and F28 are disengaged before making a further attempt.
Shunt Mode
Operated by engaging F Key 20 the speed will be reduced by one half and all inertia and momentum will be removed. This is useful for very fine control in confined spaces.
Coasting Sound Volume
You can independently change the volume of the sounds played when the loco is drifting (coasting) to suit your requirements.
CV286 = 255 is the project default. Higher values will increase volume; lower values will reduce volume relative to the other sounds.
Function Keys List There are 29 Function Keys used in this sound project. Please see below.
Some of the sounds have a finite length and will play from start to finish when selected. Other sounds will ‘loop’ until switched off, whilst others will vary in length, depending on how you operate the F keys on your DCC controller. Some keys have a control function rather than a sound.
Function List
|
Key Number
|
Sound or Control Function
|
Volume
CV
|
Sound ID
CV
|
|
F0
|
Lighting Control (If fitted)
|
-
|
-
|
|
F1
|
Sound on/off
|
-
|
-
|
|
F2
|
Brake Key– see text for explanation
|
CV517
|
CV516
|
|
F3
|
Speed Related Single Whistle
|
CV980
|
-
|
|
F4
|
Speed Related Played Whistle
|
CV980
|
-
|
|
F5
|
Light Engine Mode
|
-
|
-
|
|
F6
|
Coal Shovelling
|
CV529
|
CV527
|
|
F7
|
Injector
|
CV532
|
CV531
|
|
F8
|
Blower
|
CV535
|
CV534
|
|
F9
|
Enable Speed Related Wheel Flange (see text)
|
-
|
-
|
|
F10
|
Safety Valves Lifted
|
CV541
|
CV539
|
|
F11
|
Functioning Handbrake
|
-
|
-
|
|
F12
|
Water Filling
|
CV547
|
CV546
|
|
F13
|
Station Announcement
|
CV550
|
CV549
|
|
F14
|
On: Couple up, Off: Uncoupling
|
CV553
|
CV552
|
|
F15
|
Cylinder Drains Opened
|
CV556
|
CV555
|
|
F16
|
Guard’s Whistle and Response
|
CV982, 980
|
-
|
|
F17
|
Enable Automatic Wagons Snatching (see Text)
|
-
|
-
|
|
F18
|
Detonators
|
-
|
-
|
|
F19
|
Fade All Sounds
|
-
|
-
|
|
F20
|
Shunt Mode
|
-
|
-
|
|
F21
|
Unfitted Freight Mode
|
-
|
-
|
|
F22
|
Pinned Brakes (F21 must be on)
|
-
|
-
|
|
F23
|
“Going Under, Harry”
|
CV683
|
CV682
|
|
F24
|
“That’s an all clear from the guard”
|
CV686
|
CV685
|
|
F25
|
Passenger Guard to Driver Instructions
|
CV689
|
CV688
|
|
F26
|
Freight Guard to Driver Instructions
|
CV692
|
CV691
|
|
F27
|
Overall Volume Down
|
-
|
-
|
|
F28
|
Overall Volume Up
|
-
|
-
|
Volume setting range 1 – 255, higher values give louder sounds.


