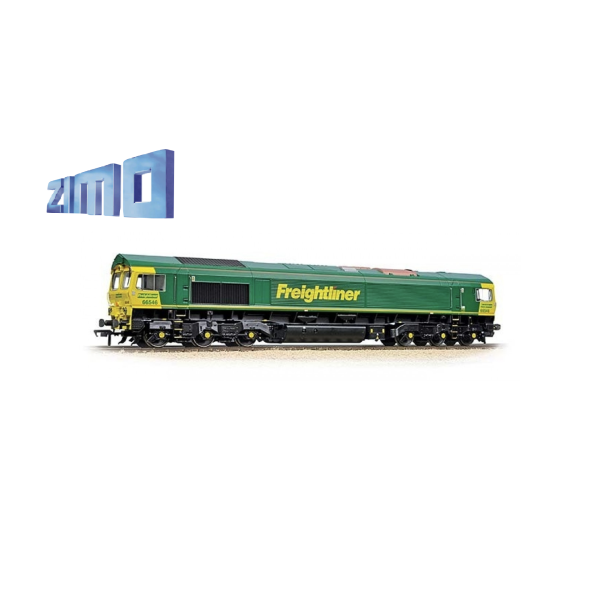
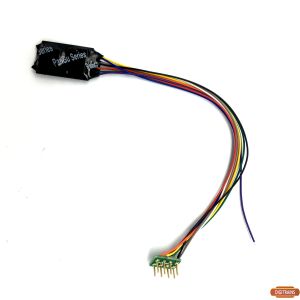
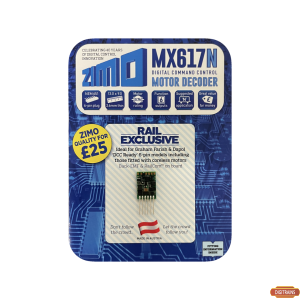
Class 66 ActiveDrive SL V17.07
Please spend a few moments to read these notes which have been produced so that you may obtain the maximum satisfaction from your new sound scheme.
The sounds should work perfectly when the decoder is fitted correctly. Individual locos may require some fine tuning that you can achieve with your DCC controller.
What is ActiveDrive SL?
This is a system developed to allow more prototypical sounds to be deployed across a wide range of operating conditions.
The sounds have been programmed in such a way that you, the user, may change the way that the sounds respond to your driving style or needs. This avoids the need for reprogramming and all the additional costs that would imply.
Engine Start Up.
The fuel lines are pressurised with a priming pump prior to starting. This pump, on the real loco, starts immediately after the Battery Isolation Switch (BIS) is closed. F14 has these sounds so that they can be played before switching on the main engine sounds.
When F 14 is engaged, the BIS sound plays, followed by the pump which will continue for as long as F14 is active.
When F14 is disengaged, the pump sound is joined by the pre-start warning alarm, a series of loud bleeps. Pressing F1 when the first bleep is heard will start the engine cranking at the correct time.
I have separated this sequence from the start up sounds so that you can choose to use it or not.
F 1 will crank and start the engine which will then settle down into Idle
On the real loco at starting, the engine is automatically speeded up for several minutes to charge the air tanks more quickly. To simulate this, engage F8 immediately after engaging F1. When enough time has elapsed for the tanks to be fully charged, disengage F8 and the engine will return to idle. This ‘compressor speed-up’ is a continuing feature so you can use it whenever you wish to add ‘life’ to a stationary model.
Throttle Response Scheme.
As supplied, the decoder will produce the sounds of a Class 66 with a train on the hook.
After the start-up routine the loco will stand with the diesel engine, the Prime Mover (PM), ticking over at idle.
The sounds will respond to the throttle control in the following way:
Select speed step 1. The brakes will release, the PM will increase power to get the loco moving, and will continue until at higher speed, a further ramp up will be initiated until the final high speed running sounds begin. The precise speed steps will depend upon your model, so I suggest you make a note of the actual figures for your later use.
The sounds will spool down at similar points on deceleration.
The model can be driven in this way without ever needing to use any control other than the throttle .
For those of you who prefer something more immersive, in this version there are extra control features to further enhance your driving pleasure.
Coasting
No matter what actual speed your model is travelling at, or which engine note range is playing, reducing the throttle by 10 speed steps (of 128) will spool down the engine sounds to ‘Coasting’
The coasting sound will continue until you accelerate; at which point the sounds will change to those relevant to the current speed.
Alternatively, to force the engine to play idling sounds, or to avoid engine ramp up when pottering about the yard, use F6 at any time
Notch Down
During any driving sound ‘loop’, at any steady engine speed, it is possible to cause the engine power to spool down to the level immediately below. This is easily achieved by reducing the speed by one step only E.g., if the loco is playing power band 3 sounds, reducing speed with your throttle by one step will cause the sound to immediately spool down to the sound of power band 2, if in power band 1, it will spool down to idle.
Acceleration of one speed step or more will immediately ramp the sound back up to the higher power. So you can now, at any road speed, vary the engine note by reducing or adding a single speed step.
Heavy Train/Light Engine Mode Selection
The default setting is for ‘heavy train’. Inertia is high so acceleration (and deceleration) is restricted.
Activated by F5, Light Engine enables multi-function changes with one key. The switched features include reduced inertia setting to allow more rapid acceleration and engine sounds which accelerate differently.
F5 can be operated at any speed to give another way in which the engine sounds at a given road speed may be modified instantly.
Note. This works best if you switch F5 on or off whilst the engine sounds are playing in idle. Once switched, you can leave it that way, but any further change should also be made with the engine sound again playing the idle loop. Just to be clear, the actual speed is unimportant, but the engine sound must be idling. You can achieve this in several ways as discussed above.
Dynamic Inertia
A combination of new features is included in the automatic operation of the throttle which will affect how the model responds to your control inputs.
The operation is identical in either ‘heavy’ or ‘light’ mode.
Put in simple terms, the wider you open the power controller, the quicker the engine sounds ramp up and for the first time on any decoder, the acceleration rate increases correspondingly.
What does this mean in practice?
If you use your controller’s throttle gently, with modest speed step increases, then the engine will rise and fall automatically and the model will accelerate according to the momentum setting. This is by default high for ‘heavy’ and low for ‘light’.
If however, you open the throttle rapidly, the engine will ramp up to full power and acceleration will be approximately 3 times quicker. This change in acceleration rate is variable and dependent upon throttle operation.
Speed Lock
This feature allows the road speed to be locked whilst the throttle control is used to control the engine power sounds playing.
Accurately simulating the sound of a heavy train slowly climbing a gradient with engine at full power is as easy as depicting it coasting down a gradient with the engine at Idle with this single new feature.
Here’s how it works.
Engage the SpeedLock Key, (F7) to fix the model’s road speed temporarily. The throttle now directly controls the engine sounds only. Increase speed steps to apply more power, decrease speed steps to spool the engine down to lower power bands or to Idle.
Disengage the SpeedLock Key when you wish to return control of the model’s speed to the throttle.
Working Loco Brakes
In a real locomotive, acceleration, speed and deceleration are under control of the driver. He will use his experience of the locomotive type, the train weight and knowledge of the route (or ‘Road’) to anticipate the control movements required to achieve the required performance and safety.
Deceleration is often achieved by reducing power only, allowing the locomotive to ‘coast’ to lower speeds. Typically, the brakes are only used to fine tune this rate of deceleration or make a halt at a specific point. Other times, strong braking will be required even at high speed.
A feature notably lacking in all other programmable decoder brands with UK sounds, is the ability to apply a variable braking force to increase the rate of deceleration when desired. This makes stopping a heavy train at a signal or station platform more difficult than it is on a real loco.
Without brake force, the locomotive’s dynamics are only partially modelled. There is no point in having the sound of brakes being applied if the rate of deceleration is unaffected.
I have designed a Brake Force feature for ZIMO decoders and have been working for months with ZIMO software engineers to turn this into a reality.
The objective is to simulate the real driving experience as closely as possible, so here’s how it works.
For optimum control and convenience, the feature needs to be assigned to a non-latching (or momentary) key. On many non-European designed DCC controllers, the only momentary key is F2. Some, like NCE PowerCab have a designated separate key which operates F key 2 from a dedicated Horn/Whistle button.
The sound project has been constructed to take these limitations into account, so the Horn/Whistle button becomes the Brake Key. (Don’t worry, the horn will not blow when you apply the brakes!).
Reduce the throttle setting to zero. The loco will coast, gradually decelerating and the engine will spool down directly to idle.
Engage Brakes with F key 2.
A short ‘dab’ will produce a short air release sound and a modest increase in deceleration rate. You can think of this as ‘Speed trimming’. This can be repeated if required, and is entirely prototypical in operation.
A longer application will produce a longer air release sound and a higher rate of deceleration.
The longer the Brake Key is held ‘on’, the greater the brake force applied
Holding the Brake Key down continuously will produce a long air release sound and the loco will perform a prototypically modelled emergency stop, i.e. Brake force increases with time; maximum brake force and deceleration rate is achieved immediately prior to coming to a halt.
Automatic brake squeal will accompany the final moments before halting.
The Brake Key can also be used to simulate ‘brake dump’ testing.
The Brake Key may also be operated during deceleration between different speeds, e.g. speed restricted areas. In this case, reduce the throttle to a suitable lower setting. The engine sound will change according to the features described earlier, so may result in a different power sound rather than engine idle. To increase the rate of deceleration, use the Brake Key as before, and the speed of the loco will be ‘trimmed’ to the newly selected speed step.
So there are no excuses available for a SPAD event.
Please note that real locos do not stop dead even during an emergency stop. To reflect this, an emergency stop will be reasonably abrupt but not sudden.
If your DCC controller is equipped with a ‘panic button’ to avert imminent catastrophe, this will still operate as usual, and will have more immediate, though less prototypical, effect than the Brake Key.
Engine Speed-up
F8 is a complementary key to F6. Whilst the latter forces the engine sounds to Idle, F8 will speed up the engine to notch 3. This will produce the sound of the compressor speed up routine, but can also be used to provide a medium power sound prior to pulling away.
Remember to switch this key off before stopping!
Live Volume Control
Provided the sound is switched on and the ‘fade’ button is not active, it is possible to change the overall volume to suit changing needs.
Engage F27 and the sound levels will gradually reduce, eventually to silence
Engage F28 and the sound levels will gradually increase, eventually to maximum.
In each case, disengage the F key when the desired level is attained. Set F27 and F28 as ‘momentary’ if your DCC controller allows you to do so.
Note: If the volume controls appear to not function, check that F19, F27 and F28 are disengaged before making a further attempt.
It’s now down to your skill and knowledge to simulate any eventuality!
Lighting
Your decoder is configured for white lights on F key 0, tail lights on F key 10 (only if physically separated from the whites), and cab light(s) on F key 20
If your model includes or if you intend to add lighting then in order for the decoder to operate individual or pairs of lights, they must have physically separate connection to the decoder as follows.
No 1 End white lights to Function Output 0f (white wire in the case of wired decoders)
tail light to Function Output 1 (green wire in the case of wired decoders)
cab lights to Function Output 3
No 2 End white lights to Function Output 0r (yellow wire in the case of wired decoders)
tail light to Function Output 2 (brown wire in the case of wired decoders)
cab lights to Function Output 4
If head and tail lights are on F0 and cablights are all on FO1 set CVs below to the values listed
127=0, 128=0, 436=10, 438=1, 440=1.
Paul Chetter Lincoln, July 2017.
Function List
|
F Key
|
|
Function/Sound
|
Volume
Setting CV
|
|
0
|
|
Lights
|
-
|
|
1
|
|
Sound On/Off
|
-
|
|
2
|
|
Brake Key (see text)
|
517
|
|
3
|
|
Horn (Hold to Extend Duration)
|
520
|
|
4
|
|
Two Tone Horn
|
523
|
|
5
|
|
Light Engine
|
-
|
|
6
|
|
Engine Idle
|
-
|
|
7
|
|
Speed lock
|
-
|
|
8
|
|
Engine speed-up
|
535
|
|
9
|
|
Flange Squeal
|
538
|
|
10
|
|
Function Output 1 and 2
|
-
|
|
11
|
|
Control Air Release
|
544
|
|
12
|
|
Spirax Valves
|
547
|
|
13
|
|
Horn
|
550
|
|
14 On
|
|
BIS/ Primer
|
553
|
|
14 Off
|
|
Primer/Alarm
|
553
|
|
15
|
|
Fan
|
556
|
|
16
|
|
Horns
|
559
|
|
17
|
|
Guard’s Whistle
|
562
|
|
18
|
|
Door Slam
|
565
|
|
19
|
|
Fade All Sounds
|
-
|
|
20
|
|
Function Output 3 and 4
|
-
|
|
21
|
|
Shunt Mode
|
-
|
|
27
|
|
Volume Down
|
-
|
|
28
|
|
Volume Up
|
-
|


